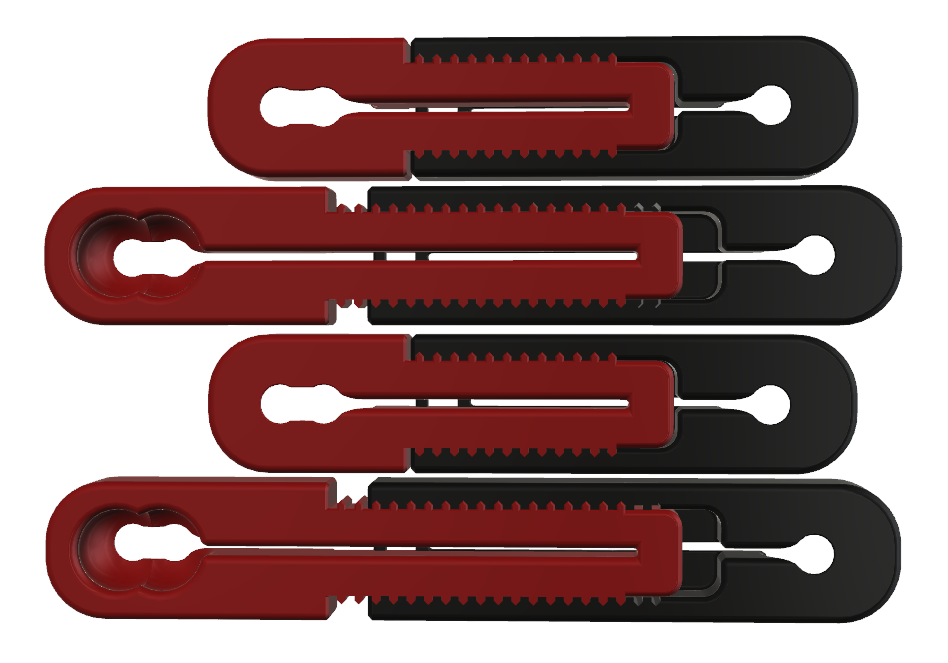
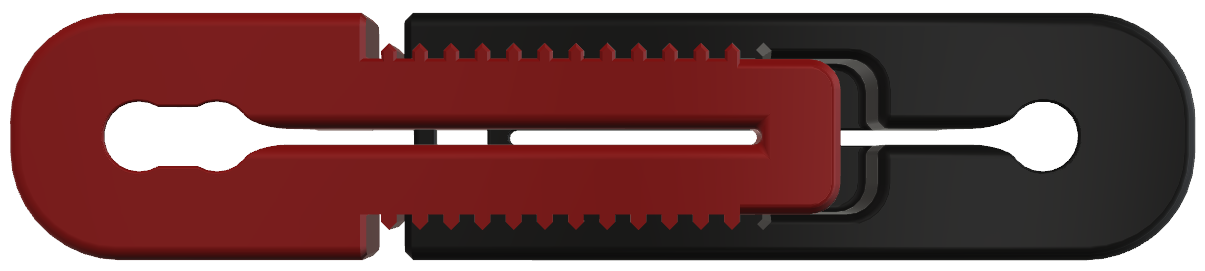
Pro Serie Full Range Adjust
Forward Link >> Short > Orig .50 mm
Rear Link >> Long > Orig. 70 mm
Every 2mm increase of length wil result in 8mm lower suspension. Every teeth represents a 2mm change in length

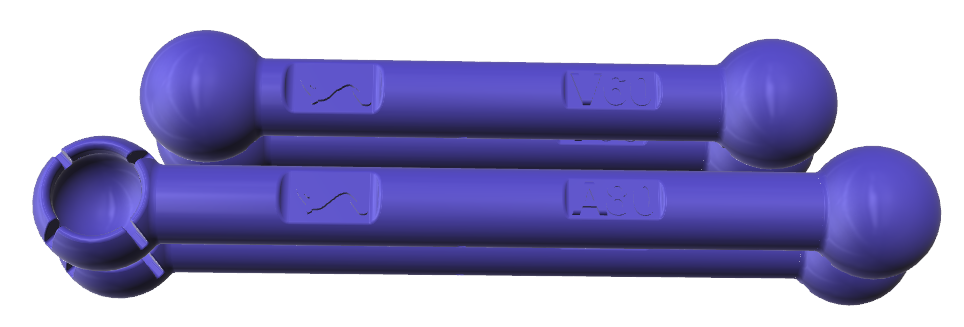
Single Step – 20mm Lowering
After mounting this link your car will be about 20 mm in every suspension setting.
Like the white one it will be 110mm ride height

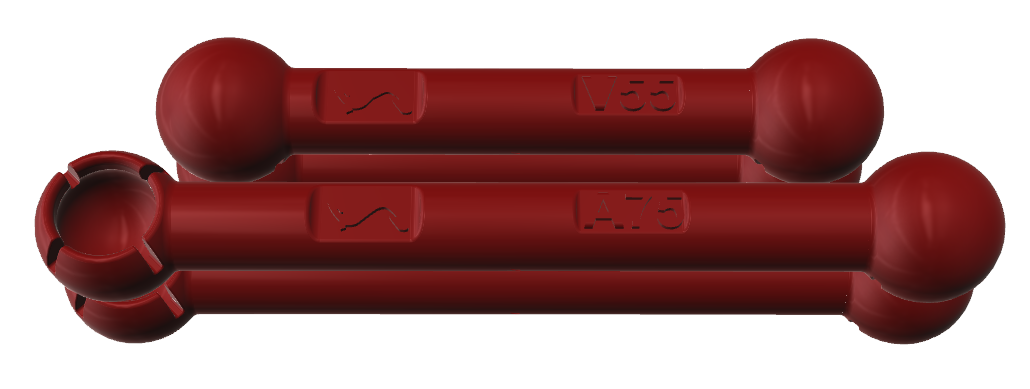
Dual Step – 40mm Lowering
After mounting this link your car will be about 40 mm in every suspension setting.
Like the red one it will be 90mm ride height

Front Linkage – Model S –
Old model -s-

Follow these simple steps, carefully
Start by selecting “Jack mode” on your car display. Jack up the car at side to work on. It would be possible to do the work without removing the wheel, however it’s better to remove the wheel when removing
the original link ( these are hard(er) to remove )
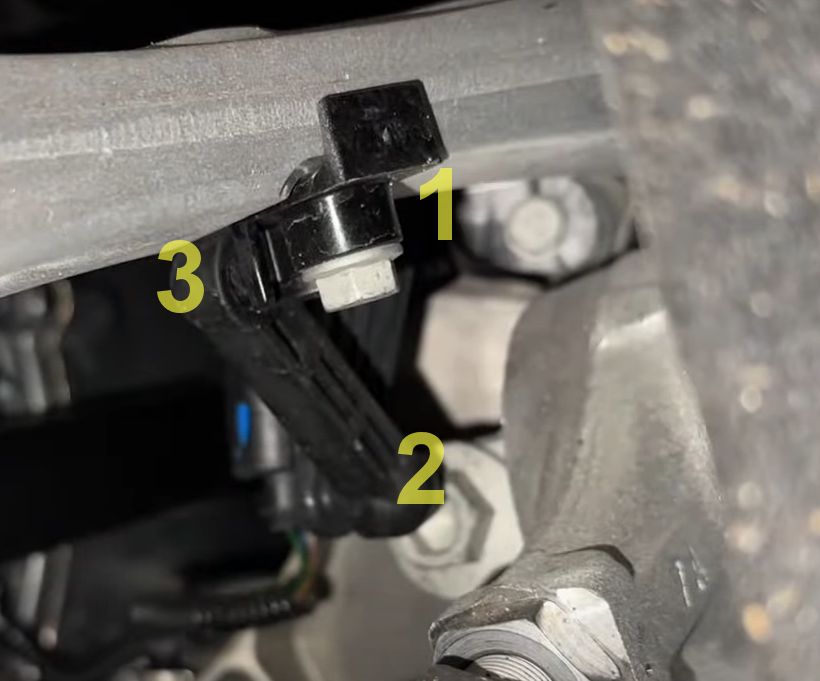
Working parts @ Ride Height Sensor system:
# 1 >> Ride Height – Sensor
# 2 >> Moving Arm – ball Joint
# 3 >> Frame fixed – ball joint.
Be aware, Always start removing the link on side of ( 3 ) “Frame fixed – ball joint”. The rubber (original links) are a very tight fit. So take your time to remove them. That is why we created the special tool. When one side of the linkage is loose, support the sensorarm when removing the link from (2) the sensor arm.
When removed, mount the new Syro Links in reverse order, starting at the sensor (2) arm (which you need to support). After that, mount the frame side. Make sure the correct size link is mounted
( ** Pro Serie Link, record the setting of the “teeth” and match both front links for lenght)
New Model -s-
Rear Linkage – Model S –
Old Model -S-
Follow these simple steps, carefully
Start by selecting “Jack mode” on your car display. Jack up the car at side to work on. It would be possible to do the work without removing the wheel, however it’s better to remove the wheel when removing
the original link ( these are hard ( er ) to remove )
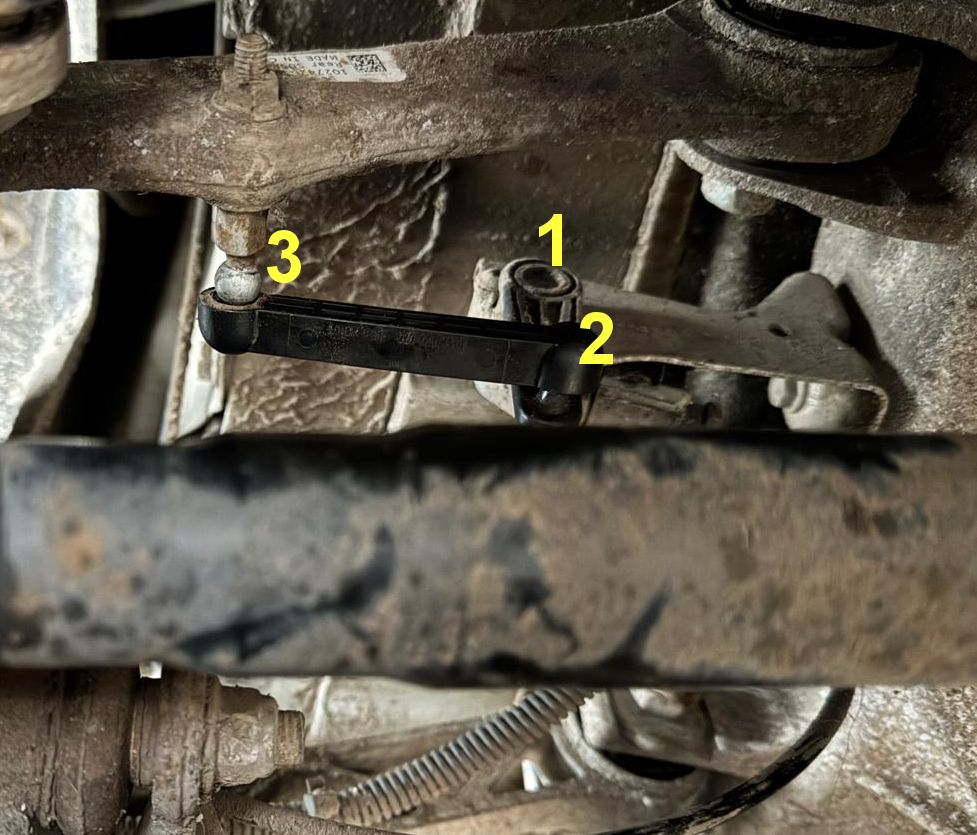
Working parts @ Ride Height Sensor system:
# 1 >> Ride Height – Sensor
# 2 >> Moving Arm – ball Joint
# 3 >> Frame fixed – ball joint.
Be aware, Always start removing the link on side of ( 3 ) “Frame fixed – ball joint”. The rubber (original links) are a very tight fit. So take your time to remove them. That is why we created the special tool. When one side of the linkage is loose, support the sensorarm when removing the link from ( 2 ) the sensor arm.
When removed, mount the new Syro Links in reverse order, starting at the sensor ( 2 ) arm (which you need to support). After that, mount the frame side. Make sure the correct size link is mounted ( ** Pro Serie Link, record the setting of the “teeth” and match both rear links for lenght )
New Model -S-